We use cookies to make your experience better. To comply with the new e-Privacy directive, we need to ask for your consent to set the cookies. Learn more.
Bathroom Tower Routing Project
This design is so universal that it could be used as a hallway unit or a display cabinet in the living room.

This bathroom storage rack is part of a suite of furniture for a modern bathroom. However, the design is so universal that it could be used equally well as a hallway unit or a display cabinet in the living room.
In this case the timber requested by the clients was oak to match the rest of the bathroom, but I am always wary of using large pieces of solid material in an environment which is going to be subjected to such extremes of humidity. It is asking too much to expect wide panels to stay flat under such conditions, so where possible I use veneered board and lip the edges with solid material, though for the smaller section material it is quite acceptable to use solid timber.
To my mind veneered blockboard is better than veneered MDF, as although dearer, it is stronger and much lighter in weight, as well as being totally stable and more pleasant to work. The downside of all these advantages is that all exposed edges need to be lipped, and you have to work it carefully to avoid chipping the very thin veneer.

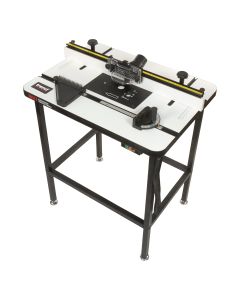
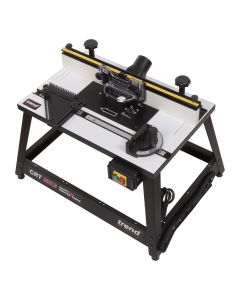
There is a lot of grooving and jointing work involved in this project and for this I prefer to use a homemade horizontal routing table. I have always found this to be much easier and more accurate to use than a vertical table, though of course they both have definite uses.
For grooving you cannot beat the accessibility and visibility of cutting the material with it flat on the table, and if you think ahead and cut all the grooves that have to match up before you change any settings, then it will all line up effortlessly at the final assembly stage.
Such a table is dead easy to make and will more than repay the time involved in its construction by its subsequent usefulness.
Step 1 - Select and Prepare Timber
The first stage in this project is to prepare the four long uprights and for speed and convenience I used solid timber for these, in this case European oak.

The material is supplied as square edged boards approximately 6 inches wide, ideal for splitting down the middle to provide two uprights from each board.

Trim up one end, to remove any end checks or splits and also any embedded grit which can damage the planer knives later. With one sound end, cut the board to length but leaving an allowance for final sizing.

Although it would be easier to plane and thickness the board as one piece, it is actually better to split it into the two components first as this releases any drying stresses and the resulting warping or twisting can be machined out in the next stages.

First plane one face of each upright, taking care to orientate it correctly on the planer to minimize tearing the grain and also working with the concave edge face down on the planer tables to have the best chance of straightening the length.

Use this flat face as a reference against the planer fence to machine a square edge, once again keeping pressure on the outfeed table to keep everything straight.

Run the pieces through the thicknesser on edge whilst they still have maximum thickness, but only feed them one as a time as they will not all necessarily be the same width and any small ones might not be gripped properly by the feed rollers or antikickback fingers.

Only once they all down to the same size can you thickness several pieces together quite safely. I also take a light pass on the previously planed edge as well, as thicknessing always seems to leave a much better finish.

With both of the edges finished you can now thickness the faces, taking several light passes from either face to reduce it down to the required thickness.

A project like this, with lots of small pieces, allows you to use up those 'useful' off cuts that have been lying around in the workshop for ages, but do machine the pieces up at the same time to ensure that all the dimensions are the same.
Step 2 - Timber Shaping
Most of the shaping work for his project can be carried out with the router, but this is much easier if you can mount it in a router table, a horizontal table of some sort even a very simple homemade design is great for this.

Lay the four uprights out on the bench and carefully mark the position of the shelves, scribing across all of them at once for maximum accuracy.

Cut the cross rails to length, ideally on something like a mitre saw where you can set up a repeat stop, so that they are all guaranteed to be spot-on for length.

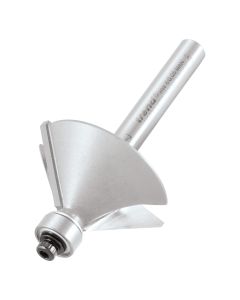
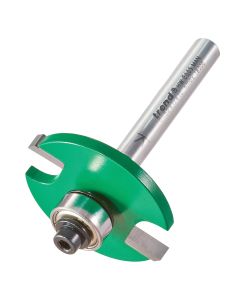
Start by machining a biscuit slot in the end of each of the cross rails, feeding the timber onto a 4mm straight bit in the router and providing support with the mitre guide in the table slot. (Trend Ref. 3/01X1/4TC or C001X1/4TC).
If you make reference marks on the router table fence to indicate where the cut should stop and start, it is very quick and easy to machine all the required slots without worrying about breaking out onto the edges.

Leaving the router on the same setting, then machine corresponding slots in the uprights, once again using the same reference marks to control the length of cut and match it to the rails.

The end frames quickly take shape and if you have worked from the face side on all the pieces they will line up perfectly, even if the groove is not exactly central.

Next machine a groove along the length of each cross rail to take the biscuits to support each shelf. Theoretically you should only cut a pocket for each individual biscuit but I find it much easier to machine a continuous groove. It makes alignment much easier at the assembly stage. Remember not to groove the two top rails.

Cut the shelves from veneered blockboard and machine matching grooves in either end of each one. Provided you have not altered the setting on the router this will line up perfectly with the cross rails, so that the bottom of the rail and the bottom of the shelf finish up perfectly flush.

Also machine a groove in the back of the shelves that are going to have an upstand on the back, as this will be biscuit jointed in place in the same way.

Use the horizontal router table again to put in a groove in the bottom two shelves to take the 4 mm white faced MDF that forms the back of the cupboard.

Fit a 6 mm straight cutter in the router and machine another groove in the uprights and cross rails to take the oak faced ply sides of the cupboard section. (Trend Ref. 3/2X1/4TC or C005X1/4TC).

Cut the ply panel to size and make a trial assembly to make sure everything still fits together, as any oversize discrepancies in the panel will stop the joint pulling up tight.

Run another groove down the back of the uprights to take the back. I had to use the router and guide fence as I could not reach in far enough using my horizontal table.
Step 3 - Initial Assembly
Assembling a project that this can be a bit of a nightmare, particularly if you work on your own. But prepare everything thoroughly before you start applying glue and then take your time, the glue does not go off that quickly.

The 50 mm cross rails are just slightly too narrow to use standard number 10 biscuits so cut the ends off them to fit the slot dimensions and at the same time provide maximum support.

Now, you can assemble the end frames using the shortened biscuits and inserting the ply side panels, constantly checking for squareness as you apply the clamps.

Once the frames are dry, clean them up using a random orbit sander with a fine abrasive pad taking care not to rub over the sharp edges.Then put a groove for the drawer bottom in each piece.

The upstands are glued and biscuit jointed to the back of the shelves in exactly the same way, but once again be careful how you apply the clamps to make sure it stays square.

Use up more offcuts to prepare the material for the door, in this case rails and stiles of solid timber and an oak faced ply panel.

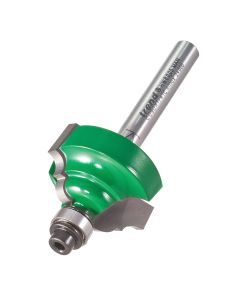
The inside front faces of the door frame have a stop-chamfer applied, and this is cut using a 45 degree chamfer bit in the router before the frame is assembled. (Trend Ref. 46/37X1/4TC or C049X1/4TC).

The panel grooves are again machined on the router table, remembering not to cut them right through the ends of the stiles.

Reinforce the corner joint of the door with a biscuit and then glue and clamp the whole assembly. If the panel had been solid it would be better to leave it loose in the frame to allow for any movement. But with these plywood panels you can apply glue round the edge to further increase the strength of the door.

The top of the unit is prepared by edging it with a wide lipping of solid material to allow the decorative underside chamfer to be machined on later.The bottom itself is a piece of 4mm white faced mdf, cut to be a fraction under size to allow easy fitting.
Step 4 - Final Assembly
Assembling a project that this can be a bit of a nightmare, particularly if you work on your own. But prepare everything thoroughly before you start applying glue and then take your time, the glue does not go off that quickly.

I found it easier to work with the unit laid horizontally on the bench, applying a couple of clamps at either end just to hold it together.

Then you can stand it upright on a flat floor to apply the rest of the clamps making frequent checks for squareness and making sure the shelves with their upstands line up perfectly with the back of the unit.

Whilst this is all drying, machine the chamfer around the underside of the top shelf using the bearing guided 45 degree cutter.

Then this top shelf can be biscuit jointed in position and the front and rear pelmets are simply glued and clamped in place.

The exposed edges of the remaining shelves can be lipped with a thin strip of solid material; I use 5 mm thick strips as this is as thin as my thicknesser will go!

The completed bathroom tower unit
Related Products

Related Videos
Bearing Guided Cutters
CDJ300 Dovetail Jig
Related Downloads
Related Test Reviews
Related Instructions

Document Download
Document Download
Document Download
Document Download
Document Download
Document Download
Related Files
Document Download
Document Download
Document Download
Document Download
Document Download