We use cookies to make your experience better. To comply with the new e-Privacy directive, we need to ask for your consent to set the cookies. Learn more.
Routing Bench Routing Project
Prolonged routing can take a serious toll on your back. This unique routing bench gives the perfect height for routing at eye level.

I am using my router more and more these days, it is just such an incredibly versatile woodworking tool. However, all this extra use combined with increasing Anno Domini, means that prolonged routing sessions have been taking a serious toll on my ageing back.
The problem is that a conventional woodworking bench or table is at the wrong height for most routing work, as you usually need to get down lower to check the action at the cutting edge. This obviously necessitates a lot of bending and stooping and you are also often working semi-prone with the router extended at arm´s length, not the ideal situation from an ergonomic point of view. I am over 6 feet tall and was really beginning to feel the strain of all this, particularly when working with the heavy-duty router.
Coupled to the physical problems, is the difficulty of holding the work securely on a conventional bench, which often has a deep fronted apron and is also very wide, making it difficult to get clamps to hold in the right place. You always seem to end up clamping and re-clamping the work several times just to make a single cut.
After yet another back aching session, I decided enough was enough and resolved to make a dedicated routing bench, incorporating a range of features deigned specifically for use with the router. For a start it needed to be very much taller so that I could always be working at elbow height. Secondly, it needed to be long and narrow with plenty of overhang on the top to allow easy clamping anywhere along the surface. The work holding capabilities were to be further enhanced by the addition of a tail vice and rows of holes that would take standard straight or adjustable dogs, or even a hold down. A very good range of these devices is produced by Veritas, all of them having standard 5/8" diameter shanks, so they are all interchangeable anywhere on the bench.
I arrived at the final benchtop height by measuring the distance from the floor to my elbow with my arms held out horizontally and subtracting two inches. This suits me personally, but experiment a little, rigging up a temporary bench at various heights to find the ideal height for you.
Step 1 - Joining the Timber
Although made from quite heavy section timber, the bench is still light enough to be moved around to accommodate different shaped workpieces and then shoved out of the way in a corner of the workshop when it is not needed.

Any timber will do for the construction, but a dense hardwood will obviously be sturdier than softwood, so I settled on using up some Iroko boards left over from a garden bench making project.
You don´t need a lot of material and I made the majority of it out of 1 inch thick board, with just a small amount of 2 inch for the feet.

The top is joined up from two pieces to increase the stability. Even if you have a single piece that is wide enough, it is worth splitting it down into two or three pieces and re-jointing it to minimize the risk of it warping later on.
Although this timber is relatively stable anyway. Plane the edges up carefully to get a straight and true joint; don´t rely on pulling the joints together with massive tightening of the sash cramps!

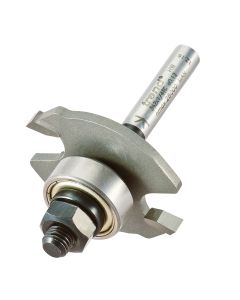
To join the pieces a simple butt joint will suffice, but reinforce it with four or five biscuits using a bearing guided biscuit cutter in your router. Trend Ref. 342x1/4TC.

The slotting cutters for these are necessarily quite large in diameter so check carefully that there is sufficient clearance through the router base before you use it, as this has caught me out once before in the past.

Provided you work from the face-side on each board you do not have to be too fussy about positioning the cutter dead on centre.

I also find it helpful to elongate the slot slightly to give a little play at the assembly stage.

Glue up the top using the sash cramps to hold the boards together rather than to close up any gaps! Excessive pressure also runs the risk of distorting the top, so take your time in the first place to produce decent fitting joints.

Set the top aside to dry and start work jointing the uprights into the feet.
Step 2 - Cutting the Mortise
The timber is also mortised and tenoned together for maximum strength, the mortise being marked out to be slightly less than the width of the tenon.

It is cut out using a long reach 1/2 inch diameter two flute bit, but with this amount of overhang it is only really possible using bits with 1/2 inch shanks.

To further minimize the inevitable vibration make sure the cutter is pushed well into the collet, certainly for the initial cuts. Don´t be tempted to just grip on the end of the bit to maximize the cutting depth as this will induce huge amounts of vibration in the cutter, which will probably result in it snapping and/or damaging the collet.

For an accurately centred mortise use the side fence to guide the cutter, and then turn the work round running the side fence down the opposite side.

As well as ensuring that the mortise is dead centre, this also allows you to cut a slot wider than the width of the bit. However, for these deep mortises always work in a series of shallow steps, taking a pass of no more than about 10mm at a time. You will also need to stop occasionally and tip out or extract out all the accumulated swarf.

With the mortise cut you can now size the tenon to suit, a much better option than doing it the other way round. There are numerous ways of cutting tenons, but for large wide ones like this I use the router, again guided by the side fence.
Step 3 - Cutting the Tenon
This next stage involves cutting and forming the tenon's as mentioned above.

Substitute the individual fence faces with a continuous strip of perfectly true timber which will make the side fence less likely to catch.

Ideally, now use a piece of scrap material to make a trial cut to gauge the correct depth of cut that will leave a snug fitting tenon. This is a process of trial and error and may take several goes to get it perfect.

Once you are happy, set the required shoulder length on the guide fence and make the first cut across the end of the leg making sure the fence presses firmly against the end of the timber at all times.

Then use the router freehand to cut away the remaining waste material, working from the end back towards the shoulder cut.
This should result in a perfect tenon with square shoulders; you then just have to cut the haunches by hand.
Step 4 - Creating the Feet and Legs
Now the legs of the table need to be formed.

The undersides of the feet need to be shaped away to maximize the stability.

Mark out the required shape with a circle template, then shape it on the bandsaw, and finally clean up with a bobbin sander.

The mortices in the legs are cut in exactly the same way as those on the feet, again cutting from both sides to ensure they are properly centred.

The stub tenons on the cross rails are necessarily quite short, but cutting the shoulders as wide as possible maximizes the lateral support when it is all assembled.

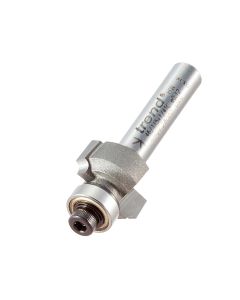
To finish the job off properly and to ensure that are no sharp corners that can be broken off with rough workshop usage, use a small radius bit to round over all the exposed edges on the feet and legs. Trend Ref. 46/115X1/4TC.
Step 5 - Assembling the Bench
The next stage involves constructing the pieces of the router bench you formed earlier.

Start the assembly by gluing the legs into the feet using a sash cramp to pull the shoulders up nice and tight, but do check it with a square, as it is so easy to pull them out of alignment if the clamp is applied at even a slight angle.

Once the leg assembly is dry, use the same procedure to clamp up the cross rails, again making sure everything is perfectly square before the glue sets.

ou should now be able to clean up the top, removing any glue squeeze-out with a sharp chisel. Even when you joint up using biscuits, there is sometimes a small step between adjacent pieces, but this is soon levelled out with a hand plane and you can then finally smooth the surface off with a random orbit sander. These are superb tools, combining the stock removal advantages of a belt sander or disc sander, with the precision of an orbital sander, to leave a virtually blemish free surface.

A small vice is mounted on one end of the bench top and it is much better to fit this now before the top is fitted to the frame, as you can work more easily with the top turned over. Screw on a suitable mounting pad, thick enough to set the vice jaws just below the bench surface, and rebate the end of the bench slightly to make sure the jaws seat properly.

Fix the vice in place with four coach screws, drilling the appropriate pilot holes first to avoid splitting either the pad or the bench top.
Step 6 - Making the Jaw Plates
This stage involves the addition of the jaw plates.

The wooden jaw plates are fitted next, with the fixed rear one being rebated to fit over the jaw.

Glue this onto the end of the bench using the vice itself as a clamp to hold it in place.

When this has set, fit the other jaw plate, screwing it through the holes provided.

With the vice closed up run the small rounding over bit all around the top edge of the bench, including the vice jaws.

The jaw plates are wider than normal to allow for the three dog holes that can be used in conjunction with stops on the bench top.
You can use either proprietary bench dogs, or turn your own from small scraps of hardwood, in this case maple.
Step 7 - Fixing the Legs to the Top
Now the legs need to be added to the router table.

The top is fixed to the legs with short braces that are initially fitted to the underside of the top using coach bolts.

Make sure the holes for these bolts are well oversize to allow for any subsequent movement of the top and do not use any glue on the braces, just bolt them on securely, making sure they stay square to the edge.

The whole top, complete with its braces is then attached to the top of the legs and once again coach screws are ideal for this but now you can also use some glue for extra rigidity.
Step 8 - Finishing off the Top
With the top in place you can drill the holes for the bench dogs, but the arrangement of these is a matter of personal preference. Then the wood will need lacquering to create a nice finish.

I settled on two long rows down the length of the top, but spaced to avoid the braces underneath. The holes were drilled at 4" centres using a spade bit as this always cuts a little oversize and allows the dogs to slide in easily. Notice the use of a spelch block cramped to the underside of the top to minimize breakout as the drill bit plunges through.

I bought an assortment of dogs and hold downs clamps from the Veritas range, all of which are 5/8" diameter, so any combination of them can be used in any position on the bench top for complete versatility.

Just to neaten the whole job off, countersink round each of the holes using a 45 degree bearing guided chamfer bit in the router.

This ensures that dogs are easy to slot in place and also stops the top surface of the bench being broken away as you pull them out.

To finish off I used a couple of coats of brushing lacquer from Behlen. This superb finish is a new discovery for me, even if it does smell somewhat unpleasant during use. You have to brush it on quite thickly and the initial finish when wet is rather disappointing, with a very gooey shine. But after an hour or so the excess shine disappears to leave a pleasant satin finish ideal for this sort of project, but it does need flatting down with very fine abrasive paper between coats.

That completes the very simple routing bench, and I did initially wonder if I had made it too high, even for me, but it has actually proved to be perfect. Although it looks a little ungainly, it is now so comfortable working at elbow height with none of that backbreaking stooping involved. I wish I had made one years ago.
This is the completed Routing Bench Project.
Variety of Routing Situations
The next four pictures show a variety of routing situations and how they are easily accommodated on the bench.

Clamping on the top with plenty of overhang allows the unrestricted use of bearing guided cutters.

The bench hold fast can be positioned anywhere on the bench.

Using jigs such as the dovetailer is so much easier with the router at eye level.

Holding circular work with the vice and bench dogs.