We use cookies to make your experience better. To comply with the new e-Privacy directive, we need to ask for your consent to set the cookies. Learn more.
TV Cabinet Routing Project
Simple construction techniques mean you can very quickly make an impressive piece of furniture with just a few tools and skill.


To a cabinet maker, the modern contemporary style of furniture is a real blessing, as its very simplicity make it so simple to build. It is usually just a series of boxes which are easily made from cheap, veneered sheet materials with some solid wood lipping to hide the edges. The appearance of thick and chunky sections is achieved by laminating several sheets together, another very simple process.
The only slight issue is how to form the joints, as conventional techniques of jointing are not applicable for these man-made materials. You are restricted to biscuit or dowel joints, or as in this case, you can actually screw it all together provided you plan the assembly sequence in advance, so that all the screw holes are eventually covered.
Step 1 - Select and Prepare Timber
My preference for material for these projects is veneered blockboard, as it is relatively light, but still very strong. MDF is another choice but this is very much heavier and long unsupported sections are prone to sag. However, these veneered materials do require care when you´re cutting them, particularly across the grain as they tend to rag badly. Fortunately there are various techniques you can apply to restrict this damage and end up with a clean cut using basic hand and power tools. You do not have to invest thousands of pounds in a sliding table saw bench with a pre-scoring facility!


You can use a jig saw or a circular saw for these initial cuts, it doesn't really matter which, but there is inevitably a certain amount of ragging across the grain. So cut the pieces slightly over length to allow for cleaning up later.


A small cordless saw is a superb tool for working sheet materials. It doesn´t have to have a huge capacity, so it can be a lightweight version which makes it much easier to handle, and there are no awkward cables to deal with either!


The long cuts down the grain are much easier, as the veneer doesn't splinter provided you use a sharp blade in the saw, but use a Clamp Guide to get a really straight cut.


The saw cuts will need a little light planing to get them really smooth, but this job is made a lot easier if you clamp several pieces together and plane them as one. A dog system in the front leg of the bench used in conjunction with the vice ensures that they stay together.


Use a hand or power plane, the extra thickness of several clamped boards provides additional support to the plane base and helps to get the cut square to the edge.


For the cross cuts you can try scoring the board first with a craft knife and then sawing along this line to minimise tearing the veneer. Sticking masking tape along the cut line is another tip worth trying.
Step 2 - Cutting the Pannels
The best way to ensure perfectly square and clean cuts is to make up a trimming jig and then use the router.


The jig is just a board of MDF with a back fence which is fractionally less in height than the thickness of the material you are trimming. The fence and end of the jig must form a perfect right angle.


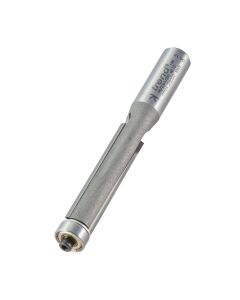
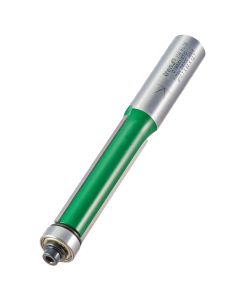
You will also need a bearing guided trimming cutter for the router, the bigger the better. Make sure it is sharp and the bearing is in good condition; fit a new one if necessary. The quality of this cut will determine how well it all fits together. Trend Ref. 46/23X1/2TC or C195X1/2TC.


Clamp the board in the jig with the finished cut line positioned exactly on the edge of the jig. Make sure the clamps are really secure as there must be no movement as you make the cut.


Now just run the cutter down the edge of the jig, feeding it with steady pressure to keep the bearing hard up against the jig. Finish off with another pass to make sure it is cut back true.


It helps if the board is cut with a saw to within 3 or 4 mm of the finished length, but leave enough to clean up any ragging on the veneer. The final edge will be perfectly true and square, impossible any other way unless you have that expensive sliding table saw!


Repeat this procedure for all the other components; you can even fit stops to the jig to make sure all the shorter pieces are identical.
Step 3 - Assembly of the Cabinet and Shelves
The initial construction just involves gluing and screwing panels together, which should be dead easy as the ends are all true, but take care that they line up exactly.


You will need to drill a hole in the first component but they will self tap into the second one, as well as being self countersinking.


For this type of work I prefer to use the screws that are specially designed for panel material.


Use temporary spacers to get the shelf position correct at either end. A powered screwdriver with the torque set quite high will ensure that the screwheads finish below the surface.


The central divider is glued and screwed from the top, but just glued onto the shelf. Provided it is a good fit and is clamped well, the glue will be more than sufficient to hold it.


Repeat the same operation using spacers to fit the bottom shelf. Check squareness as you go, but with the ends being true there should be no real problem here.


The only slightly difficult thing about this project is cutting the mitres on the ends of the facing boards that are laminated onto the screwed carcase to cover the screw holes and build up the required chunky thickness. However the same trimming jig and router make it foolproof.


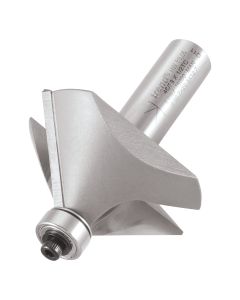
This time you will need a 45 degree chamfer cutter with a bearing, but it will need to be quite a big one to cover the angled thickness of the board. This is where a 1/2 inch capacity router is a real asset. Trend Ref. 46/38X1/2TC.


Cut the mitre in the same way, clamping the board firmly in the jig and then making a pass across with the cutter bearing in contact with the jig.


With a mitre cut on both ends of the top board it can then be glued in place. Use a roller applicator to spread an even film of glue all over the surface, taking care to get right up to the edges.


Make sure it is lined up perfectly and then use plenty of clamps to make sure it sits down perfectly flat. Beware of the board 'creeping' out of position as you tighten up the clamps, so keep checking as you apply each one.


When the top has set, cut a mitre on the end of the uprights and hold them in position to mark their length. Cut them roughly to length with the saw and trim with the straight bit as before.


Glue and clamp these as for the top, but beware of applying too much glue to the mitre or it won't pull up really tight and will leave a visible dark glue line.
Step 4 - Adding the Facings and the Door
The facings and the door need to be attached, then sanded and lacquered to finish the final product.


The finished mitre should be perfect across the full width of the board, quite impressive if you have ever tried to do it any other way!


The facings are cut from solid material and thicknessed to be exactly the same width as the two thicknesses of board.


Mitre the ends and then simply glue them in place, using plenty of clamps to pull them up tight and minimise the glue line.


The facing for the bottom shelf is fitted in the same way, but extends right down to the floor to provide a little more support for the shelves.


The door is cut from a piece of solid material, though you could use the veneered board and lip it like the rest. I usually use 'lay on' type hinges for these simple constructions as they are so easy to fit.


Just use one screw in each hinge for the initial fit as this allows you to make minor adjustments if the alignment is not quite right to start with.


To finish off give the whole job a thorough sanding using a random orbit sander fitted with fine abrasive, say 180 grit. Take care as the veneer is very thin and it is very easy to sand through it, particularly at the edges.


The completed Tv Cabinet project.
Written by Alan Holtham - Established woodworking author and video producer.

