We use cookies to make your experience better. To comply with the new e-Privacy directive, we need to ask for your consent to set the cookies. Learn more.
Cutter care and maintenance
You will soon accumulate a serious investment in cutters for your router, so it is important to do everything possible to keep them in good condition. Regular maintenance will preserve the cutting performance and enhance the life of the tool. As with all edge tools, you should sharpen them as soon as you notice they are losing their edge. Little and often is always the best policy with any form of sharpening.
One of the main causes of cutter failure is overheating, which is usually initiated by machining with a blunt cutter. This slows the feed rate, the chips stop clearing properly and then start jamming behind the cutter flute. This generates frictional heat, which then accelerates the dulling process, and you are in a downward spiral that will eventually ruin the cutter and could possibly damage the router. Meanwhile the work will show a poor surface finish with torn grain and burn marks that are impossible to remove.
Maintenance
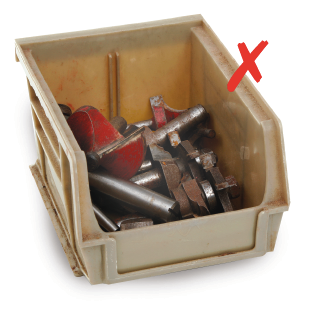
Cutter care is obviously an important issue, so start by storing them properly. Tungsten is notoriously brittle and will chip or shatter with only the slightest knock. Never leave them ratting around loosely in a box or drawer.
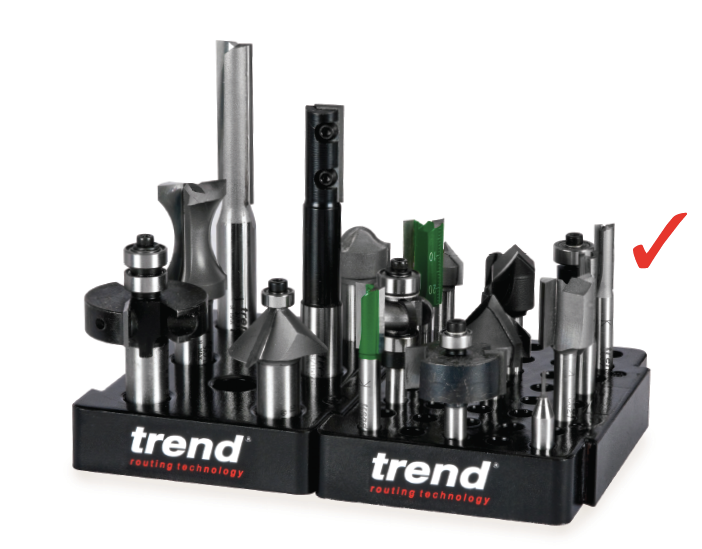
Store them either in their original packaging or in a suitable rack. In its simplest form this can be a block of wood with holes drilled in it, but make sure the bits can stand upright without touching each other. Make the holes very slightly oversize so you don’t have to force the cutters in and out and risk cutting yourself in the process.
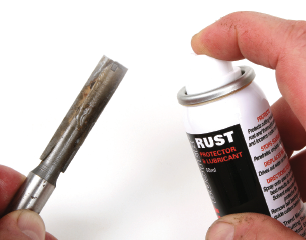
Another option is dedicated cutter racks which are available in a variety of styles and are well worth the investment. For the ultimate in storage you can buy cases with foam inserts and spare storage compartments. If they are not likely to be used for some time, spray the cutters with thin oil or rust preventing fluid. This is particularly important if you are working in a humid shed or workshop.

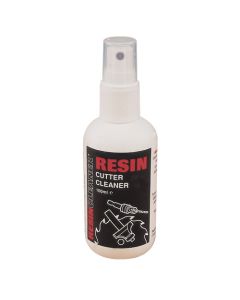
Secondly, keep your cutters clean. Resin soon builds up around the cutting edges and reduces the clearance angles leading to overheating. You can buy proprietary cleaning kits, which include resin cleaner, but oven cleaner is an excellent alternative.
Use an old toothbrush to clear away the softened deposits, never scrape at them with a knife or you will damage the cutting edges. Really stubborn deposits can be removed carefully with very fine wire wool or a fine wire brush. Once they are clean again, apply a coating of dry spray lubricant to help reduce friction and minimise further resin build-up.
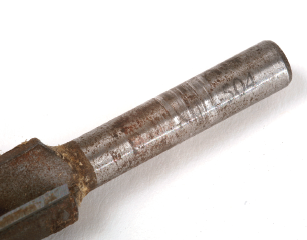
Check the shank for any score marks that might suggest that it has been slipping in the collet. This could be a sign of the collet wearing, or incorrect shank tolerance leading to poor grip and slippage.
Worn or damaged collets will cause the cutter to run out of true and will more importantly damage the shanks of all your other cutters.
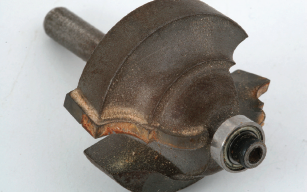
On bearing guided cutters, check that the bearing rotates freely with minimal side play. These bearings work very hard with the cutter spinning at 28,000 rpm and therefore have a limited life, so buy a few spares and replace them regularly. Be careful to keep any resin cleaners away from the bearings or you will dissolve their internal greasing.
Sharpening cutters
You can keep your cutters sharp with regular light honing, the trick is to do it when the edge is just dull rather than blunt.
After repeated honing the cutter will require professional regrinding either by a local saw doctor or by the original manufacturer, as the better ones will offer a sharpening service.
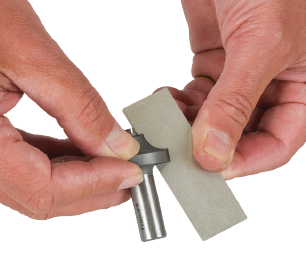
Cutters should only be honed on the flat faces of the cutting blade, as this will not alter the shape or the relief and clearance angles.
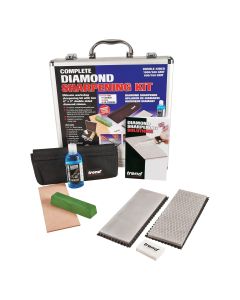
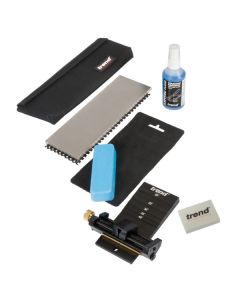
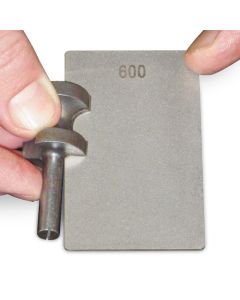
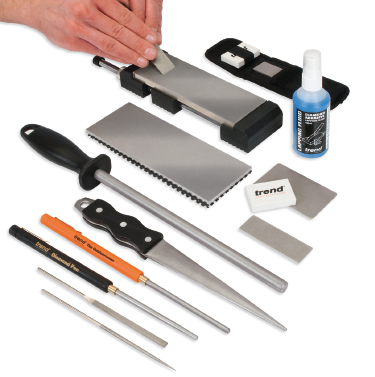
For HSS cutters you can use conventional oilstones, but for TCT cutters you will need a diamond stone. These are readily available in a variety of shapes, sizes and grades.
Diamond Sharpening Stones, offered by Trend, are very effective for honing router cutters in both tungsten carbide and HSS. For router cutters, it is advisable to use the 600 grit (red) to maintain a fine smooth face. The 300 grit grade (blue) can also be used if necessary to bring an edge quickly to the cutter. Lubricate the stone with lapping fluid to lubricate and disperse the metal particles.
However, do remember to dry the stone before storage. The stone can also be cleaned with a cleaning block. Hone the cutter using light strokes only as the diamond particles embedded in the stone's nickel layer cut quickly. Remember to hone each face an equal number of times.

The fine grade is ideal for router cutters, although they may benefit from a further polish on an extra fine version. Do clean the cutters before you start though, or you will clog the sharpening stone with resin.
Diamond stones can be lubricated with a little water, but always dry both them and the cutter after use to prevent rusting. Some people prefer to use thin oil as a lubricant on diamond stones, but there is now a specially formulated diamond stone lubricant which is much better.
To hone the face of the cutting edge, press it firmly onto the face of the stone and draw it backwards and forwards a few times, making sure it is kept flat at all times.
A few strokes should be enough as the diamond stones cut quickly, but remember to take the same amount off either side. Never try and hone the grinding angles.
In many cases with less expensive small diameter cutters, it is possibly uneconomic to re-sharpen them. With poorer quality cutters, the carbide may not be fit for re-sharpening and there is the risk of the carbide cracking during the grinding operation. Under normal circumstances, it should be possible to re-sharpen professional-grade cutters up to at least four times, depending on the type of cutter.
When purchasing cutters, in particular those with complex shapes, selecting quality professional grade cutters such as those in the Trend Professional Range will always prove a far better investment as they can be successfully sharpened many times over.
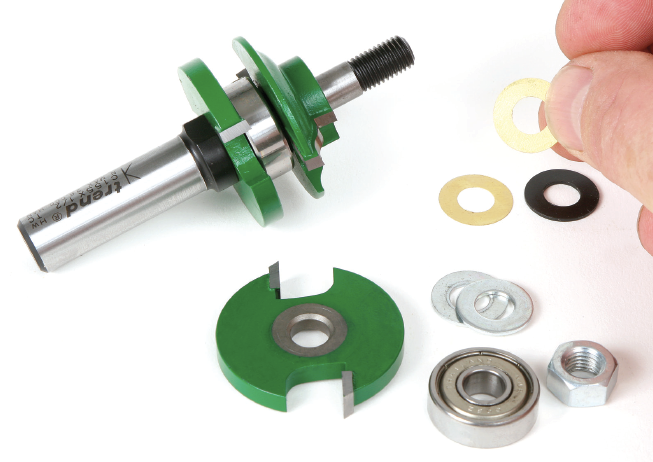
With shaped cutters which are chipped, sharpening will alter the profile of the cutter, the deeper the chip the more carbide will be removed by grinding. In most circumstances the change in the size of the profile or mould produced by the cutter will not be detectable, but where the dimensions of the mould are crucial, for example, if it is part of a jointing set, then a poor joint will be obtained. It is therefore advisable to supply the matching cutter for modification to match the pair. With arbor-mounted jointing cutters, shims can be used to compensate for the thickness of tungsten carbide removed during the sharpening process.
When ball-bearing guided trimmers are sharpened, the sleeve on the ball-bearing may need to be reduced to the same diameter. Often the ball-bearing will require replacing with a smaller size which will require bushing to the correct diameter of the cutter. The extra cost of this should be born in mind. Your cutter supplier should be able to supply you with a standard price list for sharpening all types of cutter.
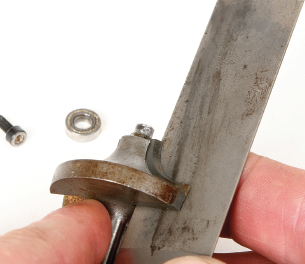
For bearing guided cutters, remove the bearing first but take care not to run the locating pin against the stone or you will damage it. Similarly, take care with pin-guided cutters, as even very slight scoring on the pin will cause it to mark the timber.
Regrinding
Badly chipped edges cannot be restored by honing; the only answer is to have them professionally reground. This is usually successful if the damage is not too severe, though on small or inexpensive cutters it is better to replace them rather than try a rescue job.
Cheap cutters in particular, are often not strong enough to regrind and their thin carbide chips may shatter.You should be able to regrind professional quality cutters up to four times if they are well maintained, but after that the cutting geometry starts to alter significantly enough to affect the cut and replacement is the only answer.
Regrinding will inevitably alter the profile of the cutter slightly, which may not be important unless it is part of a matched jointing set. In this case, both cutters must be reground by the same amount at the same time. Shims are usually provided with arbor mounted cutters to compensate for the thickness of tungsten removed during grinding.
Cutter damage and breakage
Although quality cutters are designed and made to withstand the forces of continuous professional use, damage can occur for a number of reasons and for future reference, it is always worth trying to find the cause. Very rarely is it due to some form of manufacturing fault or flaw in the cutter.
Usually it is caused by the operator either selecting the wrong type of bit for the job, or applying it incorrectly. Many newcomers to routing try to cut too deeply in one pass, or to feed incorrectly, both of which will damage cutters, particularly narrow ones.
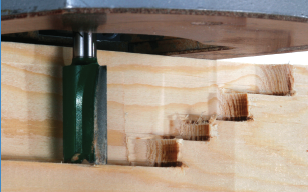
Deep cuts should always be made in a series of shallow passes to avoid placing too much side pressure on the cutter and to allow the waste to clear. If you feed the router too fast the cutter cannot clear the waste quickly enough and will start to overheat and vibrate. The waste may also pack in behind the cutter and start forcing it off line.
Smaller cutters have narrower flutes and should therefore be fed more slowly. Conversely, feeding too slowly is a common cause of overheating. You do not obtain a better finish by going slowly; all that happens is that the surface burns and the cutting edge is dulled. Determining the correct feed speed is covered in detail later in the Routing Techniques chapter
Cutter damage and causes
1. Cutter tip chipped
The most common cause of chipping is contact with a foreign object of some sort. This may be a nail or screw in reclaimed timber, or even a dead knot. These knots are extremely hard and often contain ingrown mineral crystals that easily damage a brittle carbide tip.
Damage can also occur if the router is left on the bench with the cutter exposed, so always retract it back into the base, or stand it on a block if you don’t want to disturb the setting
2. Tip breakage
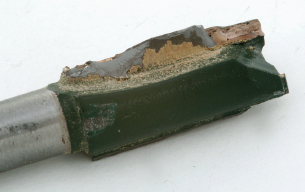
This can be caused in the same way as tip chipping but severe cases are caused by excessive side pressure on the cutter, or feeding too fast.
The cheaper the quality of cutter, the more likely this is to happen, as poor brazing or inadequate support for the cutting edges are characteristic of cheap cutters.
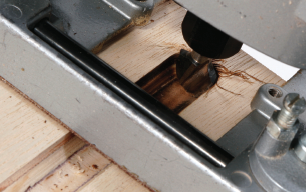
3. Bent shank
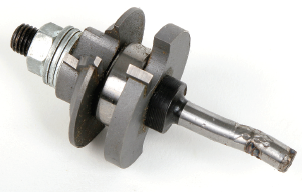
This is usually caused by a combination of not putting the cutter far enough into the collet and then using too much feed pressure with a dull cutter set too deep. The general rule is to have a minimum of two thirds of the shank into the collet for maximum support.
Good quality cutters will have an insertion point marked on the shank. The shank can also be bent if you get a kickback by applying the cutter to the work before it has reached full cutting speed.
4. Broken shanks
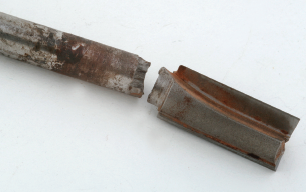
Shanks can be broken by excessive side loads and/or a faulty collet. Side load increases dramatically as you take a deep cut, so never exceed a cutting depth equal to the diameter of the bit in one pass.
Over-tightening the collet may score the shank and form a point of weakness, as may a damaged collet, or vibration from worn motor bearings. Violent or sudden changes of feed direction will cause deflection beyond the normal limits, so always work smoothly and steadily.
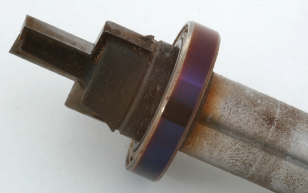
5. Burnt cutting edges
These are usually the result of feeding too slowly, though forcing a blunt cutter or cutting too deep may have the same effect.
Using HSS on very hard and abrasive materials will also quickly burn the edges. Once damaged in this way, the cutter is effectively ruined.
6. Bearing failure
Premature bearing failure is usually caused when they clog with swarf and dust. They are packed with grease and sealed for life so do not try and lubricate them, especially with thin oil, as this will just dissolve the grease.
However, they should be regarded as consumable and replaced immediately they are found to be overheating.
7. Resin build-up
Resin from natural timbers, especially softwoods and plywood will stick to the back of the cutter and affect the clearance angle. Take care not to scratch the cutter by cleaning roughly with wire brushes or scraping hard with a knife, as this will leave scratches that accumulate resin.
8. Repeated re-sharpening
Repeated re-sharpening will reduce all the clearance angles and weaken the cutting edges to such an extent that waste becomes trapped and the cutter rubs on the work. Cutters only have limited re-grinding life particularly if they are small.
Extending the life of a cutter
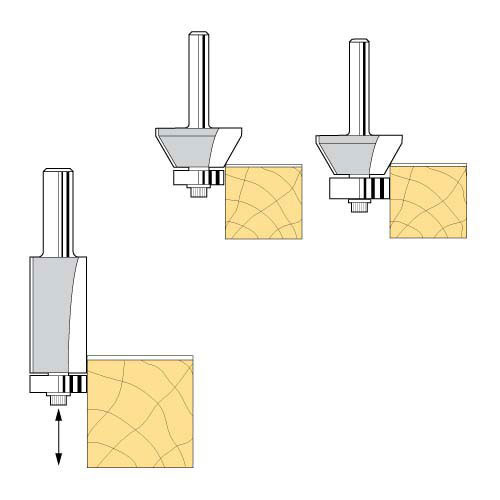
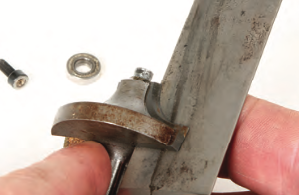
To prevent excessive wear of the tungsten carbide when trimming the laminate, adjust the height of the cutter at regular intervals. This will ensure that wear is evenly spread along the complete length of the cutting edges. To spread the wear in this way when trimming with a chamfer cutter, it will be necessary to use a larger ball-bearing which will change the point of wear.
The life of a trimming cutter can also be extended by trimming only 3mm in one pass. The use of an overlap trimmer to pre-trim the laminate to this margin will greatly help in prolonging its life. By adopting this method the quality of finish will be improved.