We use cookies to make your experience better. To comply with the new e-Privacy directive, we need to ask for your consent to set the cookies. Learn more.
Hall Table Routing Project
This small console table project typifies the router´s complete versatility.

This small console table was a commission from some existing clients who wanted a small piece of furniture as a feature in the corner of a large hallway. As usual budget was tight, so I had to mechanise as much as possible of the making process. We settled on Goncalo alves for the timber as it is relatively cheap but with time it develops a rich brown and orange colouration that looks very decorative.
So start by machining out the material for the leg sections. Unless the timber is extremely expensive I always cut a few spare pieces at this stage. It is so handy having a 'waste' piece to use for setting up the various cuts, and if you make a mistake with nothing in reserve, it is very difficult to return to the exact machine settings to make another piece. For what it costs in material, the reserve pieces are invaluable. Just wait until you cut two left hand pieces by mistake and are in a hurry to finish if you don't believe me!
The design is very traditional and solid, so it is quite straightforward to make, the only possible difficulty being with the four legs, each of which has a tapered section on two sides. But this is where the router comes in, and a simple template ensures they are all identical.
Step 1 - Making the Table Legs
With this in mind I cut out five legs, finishing them at 40 x 40. To form the taper I cut out the required template in a piece of 10 mm MDF, planing the edges really smooth to form a good surface for the router cutter to follow.

Use this template to mark out the waste material on the two faces of each leg and then cut this away on the bandsaw, but make the cut slightly clear of the line.

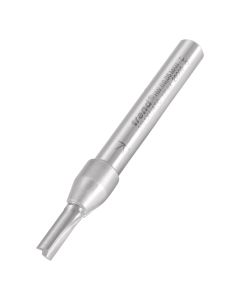
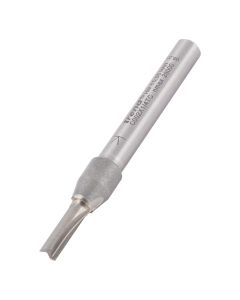
To shape back to the template you will need a trimming cutter of some sort.

These are bearing guided cutters that are normally straight but may have the bearing at the top or the bottom of the cutter. It doesnÕt matter which you use, it is a matter of convenience for each particular job. In this case I felt it would be better to work with the template on the top of the timber, so I used a cutter with the bearing on the top. Trend Ref. 46/09X1/2TC.

This is fine if you have plenty of support for the router base, but the tapering leg actually left very little to run the router base along. particularly at the end of the cut. Although you might get away hand holding the router in this situation there is always the danger that the router can tip sideways. Even the slightest tip will put a large mark in the leg when you are using long cutters like this.

One alternative is to mount the router in a table, but this is not always convenient. If not, use the other legs and a piece of spare template material to build up a support to one side of the leg, and then the router cannot go anywhere. Of course the template must be firmly fixed to the leg, a couple of strips of double sided tape is the easiest answer, but you will have to replace them each time you move the template.

With the bulk of the waste removed with the bandsaw it is very quick to shape the leg and provided the template was cut perfectly smooth, you should get a similar finish on the leg. Care in preparing the template is time well spent because the cutter will follow the tiniest irregularity, and what's more it will mirror it on each leg!

You should soon end up with four identical legs, or five if you are making spares. It still gives me quite a thrill to see the perfectly identical components start to pile up on the bench using nothing more sophisticated than a router and a piece of MDF.

The next step is to cut the mortices for the sides and I did hesitate here as regards the front. Three sides are full height sections that enclose the drawers, but the front is obviously just narrow rails to take the drawers themselves. Whilst it is better cabinet-making practice to make the mortices for these rails specifically to fit, I was working on a limited time and budget, so ran the same full-length mortice on all four legs and filled in the excess later.
Not ideal but it works and doesn't show in the finished piece! The best way to cut the mortice is to fit two side fences on the router, sandwiching the timber between. That way there is no chance of the cutter wandering off as can sometimes happen with these deep cuts. Don't try and reach the full depth in one pass though; you will overload both the router and the cutter. I made three passes for each mortice, but if you set the depth stop for the final one they will all end up the same.

For the tenons I used the router mounted under a table, using a straight cutter and the fence to set the dimensions.
It is here that your spare pieces will come in handy as it may take several attempts to get the tenon to fit perfectly. Keep it slightly slack rather than over tight or you will struggle to get it all together when the glue is applied.
Step 2 - Preparing material for Assembly
Additional routing needs to be done before the the carcase can be built.

If you cut the mortise slightly short and then haunch the tenon you will end up with a much neater joint with no evidence of how it was made. The finished table is square so form the same tenon on four identical pieces.

A dry fit is essential to make sure the shoulders are identical. They should be, but you never know and it is better to find out now rather than when they are covered in fast setting glue!

Rip one of the sides up into three strips to form the front rails between the drawers.

With these in the right place you can use some machined-up scrap to fill in the exposed mortice, again haunch each tenon for a neat finish.

The carcase is now ready for assembly, but before you start it is better to do all the finishing work while everything is still accessible. Start by rounding over the arris on all four edges of the legs. A 3 mm radius, rounding-over cutter with a bearing makes short work of this, the softer profile looks so much better than a sharply square one for a piece like this.
Do the same thing on the bottom edge of the solid side and back panels, as well as the lower front rail.
Step 3 - Assembly of the Carcase
The carcase is now ready for assembly.

Give it all a good sanding at this stage as well; I use a small orbital sander working down the grades of abrasive to 220 grit.
Whilst a lot of makers suggest that this is bad practice in that it leaves scratches that show up when you polish, I have never had any problems. But I do only use good quality fine abrasives. Use a cabinet scraper if you are not keen on the sanding option or if the grain is very wild.

Now you can start putting it all together, making up the two sides first, clamping them firmly until the glue has set.

Complete the assembly by joining up the two halves with the cross rails. Do take care here to make sure the drawer openings are even and square. There is little chance of it being wrong at the back with such a wide rail, but the narrow front ones are easily misplaced.
Step 4 - Making the Draws
The next stage of the project involves routing a dovetail joints for the hall table draws.

I used up some offcuts of cedar for making the drawers, a very traditional choice, but it doesn't really matter what you use. Personally I like to see a contrast in colour, but it is a matter of taste. The simplest construction is a simple box drawer and then plant on a front.

I used the Trend CDJ 300 Jig which is simple to operate and allows you to adjust the pin offset a little, although the distance between each pin is fixed.

For any sort of dovetail jig work though, you will need a fine adjuster on the router to fine tune the fit of the joint.

The template I used was for cutting lap dovetails but with my timber thickness the lap was minimal and the joint almost looked like a through version.

Like all the other jointing operations this will need some trial and error before the joint is perfect, so once again cut some spare material for trial cuts.
Also make sure you clearly mark the orientation of each piece relative to the other, or you will end up with a zigzag rather than a complete box, I have done it!

The drawer bottom is slotted in so use a straight cutter in the router table to put in a suitable groove. Trend Ref. 3/01X1/4TC or C002X1/4TC.
Step 5 - Assembling the Drawers
Cedar is very brittle so only lightly dry fit the joints together at this stage.

If you hammer them home you will probably break bits off the pins when you try and knock them apart for gluing.

I used 4mm melamine faced material for the actual bottom, as it is so clean and plenty strong enough for a small drawer like this. With this in place glue and clamp up the drawers, again paying attention to getting them square. This is so important if they are to fit properly and errors are not always obvious until it is too late.

The top is made up from three pieces biscuited together, another simple task using the router and a bearing guided slotting cutter. Trend Ref. 342x1/4TC .

You don't have to centralise the biscuit either, just make sure you work from the face side on each piece and it's bound to line up.

Two biscuits per joint should be enough on a top this size, but use cramps top and bottom to stop it bowing as you tighten up.

Whilst you are in gluing mode, fit the drawer fronts on as well. These simply stick on, but watch that they don't slide out of position as you apply the cramps.
Step 6 - Edging and Attaching the Top
Once it is dry, any excess glue squeezed out of the top can be removed with a cabinet scraper.

Hopefully the joints should be flush, so a light sanding is all that's needed to finish off.

The edge of the top is rounded over from both sides, but the top one is a bigger radius than the bottom. In this situation always do the smaller radius first or you will cut away the bearing surface for the second one if you use the bigger cutter first.

At this stage I realised I had forgotten to put in the grooves for the top fixing lugs, so I had to use the slotting cutter again. Unfortunately there is now very little rail to rest the router on, so clamp a block on the side to give you a bigger bearing surface. Repeat all the way round on all four sides.

Cut the fixing lugs from a strip of rebated material, the tongue of which is a sliding fit in the slot you have just cut in the rails.

These then screw into the top and hold it firm, but allow it to move with any changes in humidity. I also put in some runners to support and guide the drawers, just gluing and cramping them in place.

The drawers will probably need some fine adjustment to get them sliding freely. A little wax on the runners works wonders sometimes!
Step 7 - Finishing the Project
With the main construction completed the table is ready for finishing, and you can make your own decision here.

I use a brushed coat of cellulose sanding sealer as a starter, and then flatted it down before building up several coats of pre cat satin lacquer. If you can spray this, so much the better, but it will brush if you thin it a bit. Remember to take the top off and treat both sides the same or it will bow if you just lacquer the top face.

The final job is to fit a couple of small knobs on the drawers. I turned them from a small offcut of ebony, but standard brass ones would probably look fine.

Turn a small integral dowel on each and fit them into a drilled hole on the middle of each drawer.
The finished result was very pleasing, I think striking a balance between budget price and hence simple construction versus the quality bespoke furniture look, but IÕll let you be the judge of that. The clients paid up anyway!

The completed Hall Table Routing Table.
Written by Alan Holtham - Established woodworking author and video producer.