We use cookies to make your experience better. To comply with the new e-Privacy directive, we need to ask for your consent to set the cookies. Learn more.
Easel Routing Project
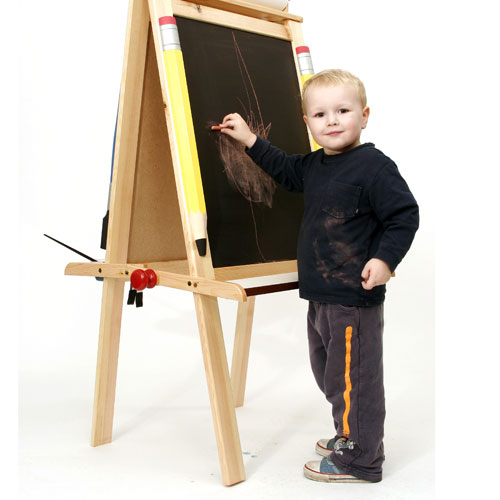
A sturdy easel which will really brighten up any play area.
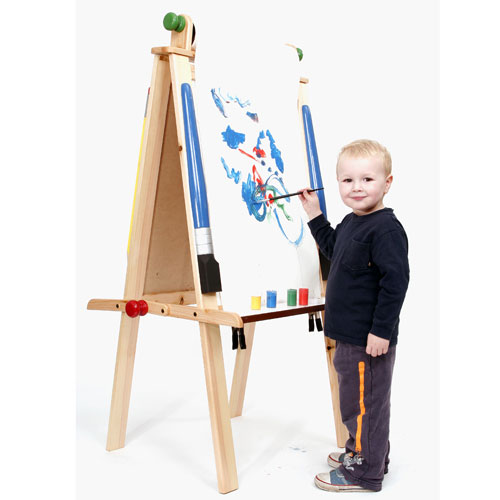
This sturdy project was the result of a request from our local playgroup, to replace a rather flimsy and easily pushed over easel that was rapidly nearing the end of its days.
The design is an amalgam of ideas collected after half an hour surfing the net and incorporates four different working surfaces that can be used simultaneously by two children at a time. The conventional blackboard is also magnetic so it can be used with any of the standard stick-on numerals and letters. The whiteboard can be used with suitable pens, or alternatively it can be covered with paper pulled down from the upper roll for painting work, so pretty well most activities are covered in the single 'workstation'.
Step 1 - Selecting and Preparing Timber
Although the main construction material is softwood, I am not very keen on buying standard prepared sections, as these are rarely straight or true. Instead I now buy rough sawn planks of redwood from my local builder´s merchants and machine these up to the required sizes.
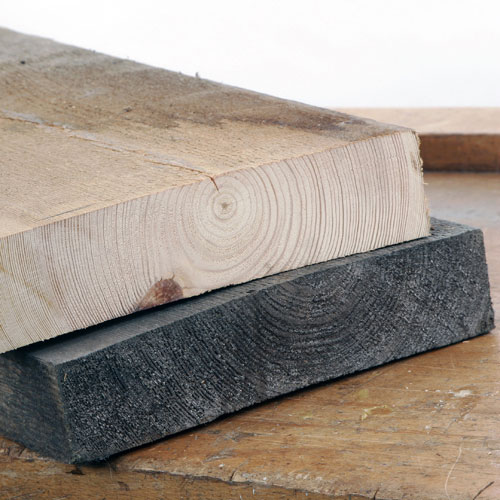
Although it is also theoretically a cheaper option, there is always a certain amount of waste, as many of the boards contain the heartwood with all its associated splits and cracks, Nevertheless with careful cutting you can minimize the waste and the quality will certainly be very much better.
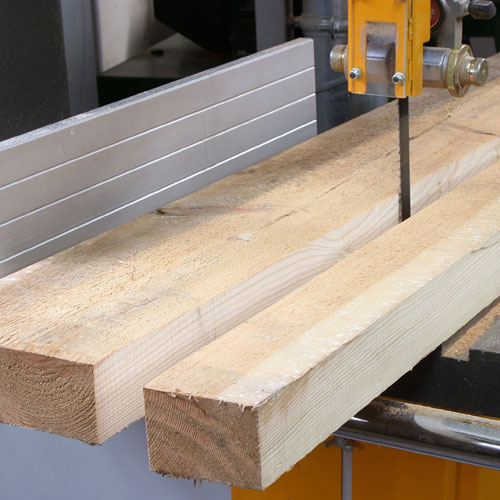
After crosscutting to length, the boards can be ripped down on the bandsaw, leaving the dimensions slightly oversize to allow room for clean up the bowing and twisting that inevitably occurs when you cut small sections from a larger plank.
After the initial machining, the workpieces can then be more carefully resawn to the finished sizes, allowing just a whisker for the final planing cuts.
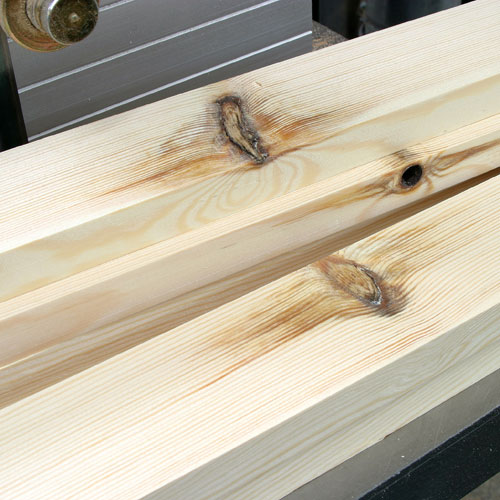
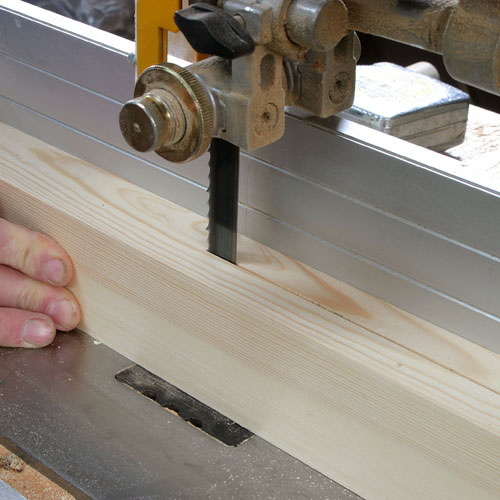
Always cut a few spare pieces, as there may be some defects that are just too big to be acceptable. As a general rule with softwood, I am not too concerned with large knots provided they are sound, but if they are dead or loose, or in a position that affects the strength of the components, then I cut around them.
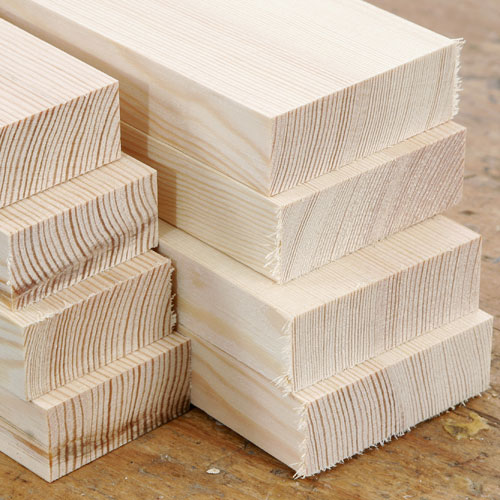
A few minutes work with the planer thicknesser results in a neat pile of perfectly dimensioned material, always the most exciting stage for any project, as the real woodworking can now begin.
Step 2 - Constructing the Frame
Slotting, glueing, clamping and drilling will take place in order to construct the frame of the easel.
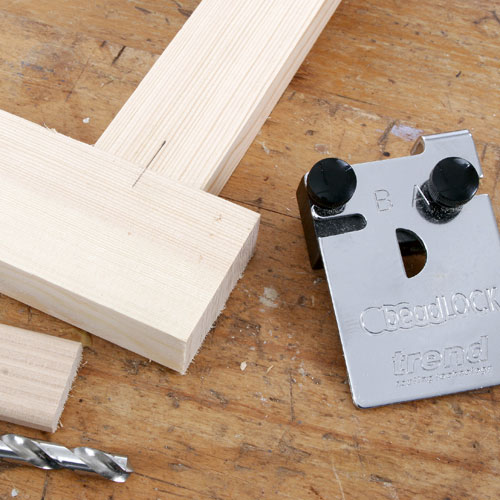
The frames are made up using butt joints strengthened using the Trend Beadlock system.
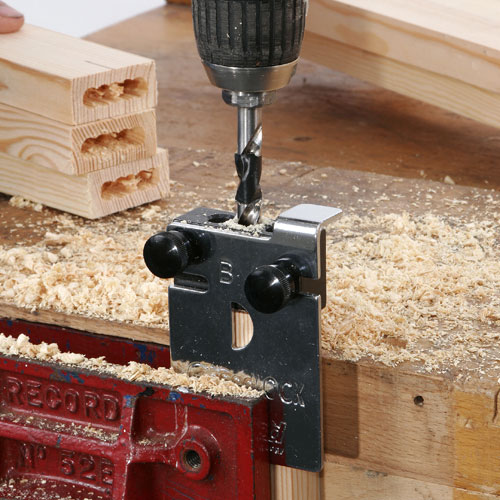
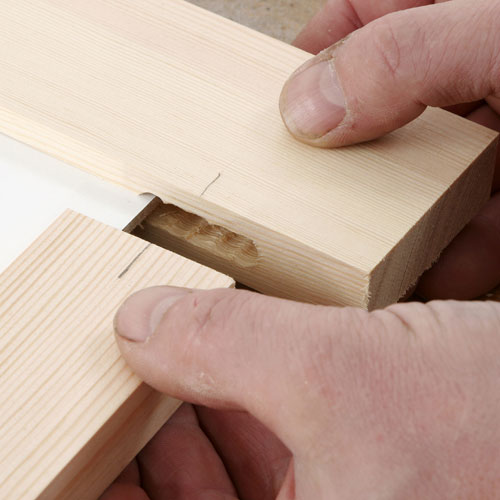
To my mind this is one of the best and simplest jointing systems around and results in a very strong joint that rivals the mechanical strength of the conventional mortise and tenon, but involves just a fraction of the work. The mortices are formed using the sliding jig and a twist drill.
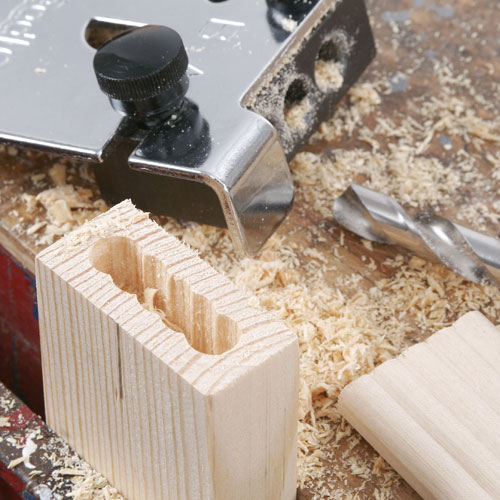
The clever arrangement of the jig resulting in a series of overlapping holes to accommodate the pre-formed tenon that you just cut to length.

The only requirement is to mark the centre line of each joint carefully, after that the rest is easy and the joints are finished in no time.
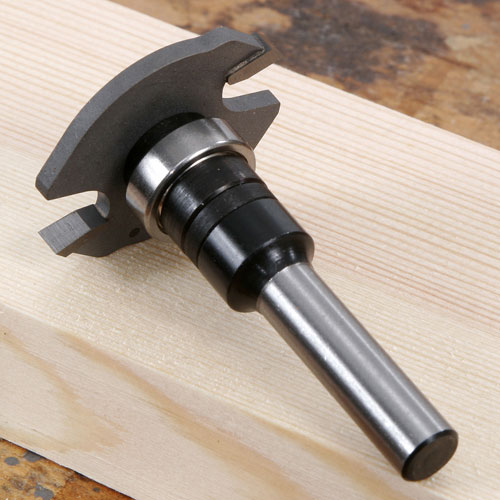
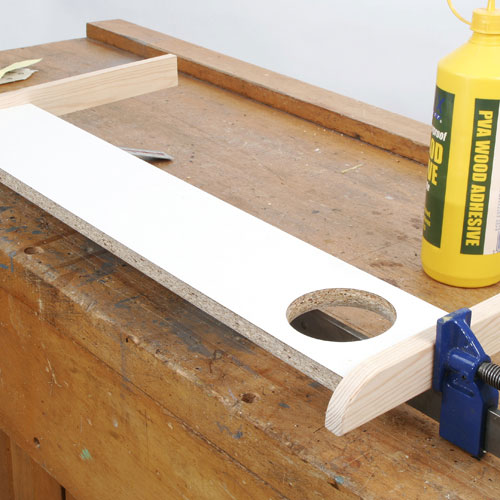
The frames have to be grooved to take the panels and for this I use a slotting cutter in the router fitted with a suitable bearing to control the depth of cut.
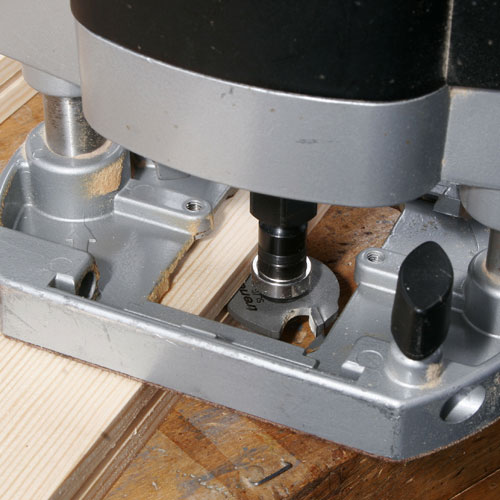
This is a safer option than trying to balance the router on the edge of the work using a two flute cutter, but remember to work from the face side on each piece and stop the groove at the joint line on the upright components.
The inserted panels are both pieces of coated MDF. I bought a cheap whiteboard from a local stationers, discarded the frame and then cut it to size.
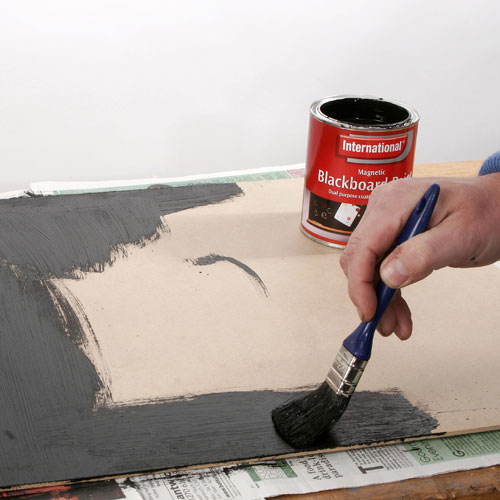
For the blackboard surface, use another piece of MDF or even hardboard and paint it using proper blackboard paint. I managed to find magnetic paint, which initially appears to be pretty useless, but by building up three or four heavy coats I eventually managed to achieve a decent magnetic surface.
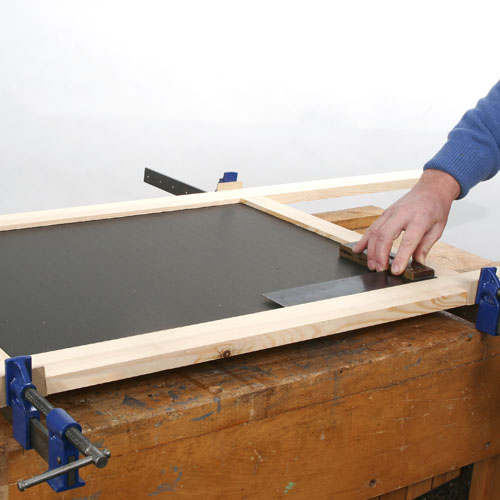
With the panels inserted in the grooves, glue and cramp the frames together making sure that they stay square as you tighten up.
Step 3 - Routing Application
Additional routing on the frame is done to the smooth edges.
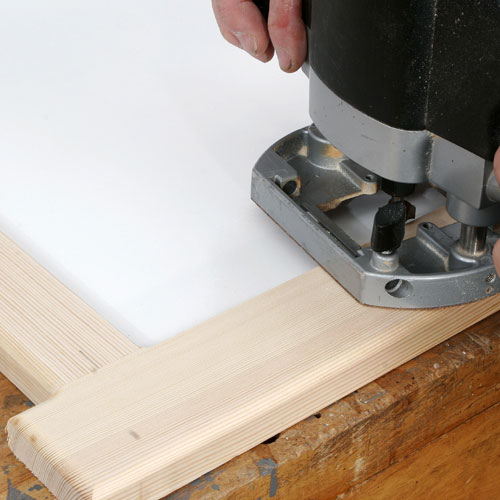
Once they are dry, run a bearing guided router cutter around the edges to form a small radius.
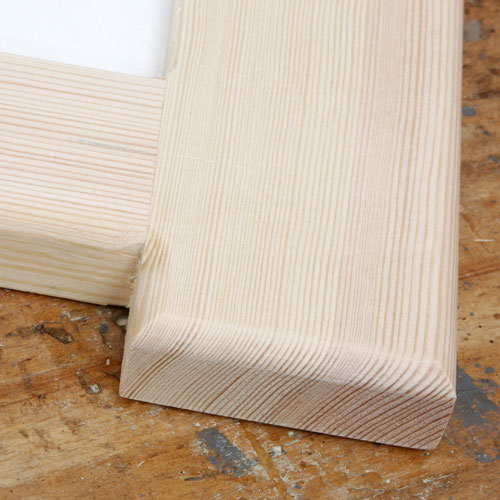
As well as the cosmetic improvement, this ensures that there are no sharp edges left that are likely to cause splinters in small fingers.
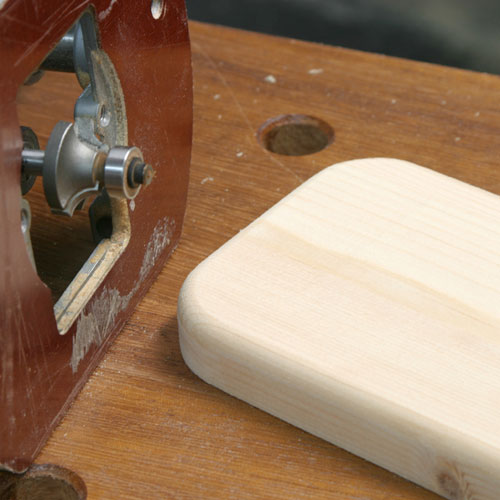
With safety in mind, I also removed the sharp corner of the top board on the drum sander just in case the easel was ever knocked over, and also radiused the edges to match the frame.
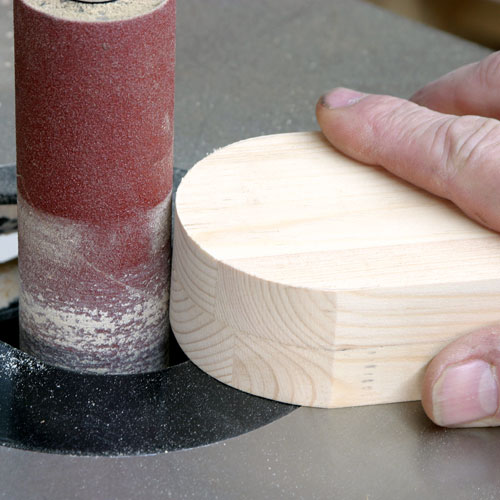
Use double-sided tape to temporarily stick together the two support pieces for the paper roll holder and then shape them as one, once again finishing off on the drum sander.
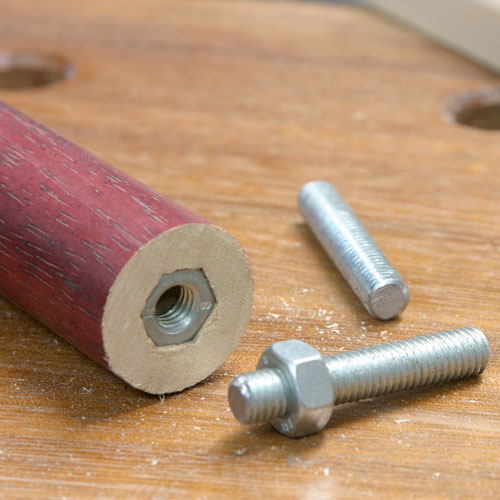
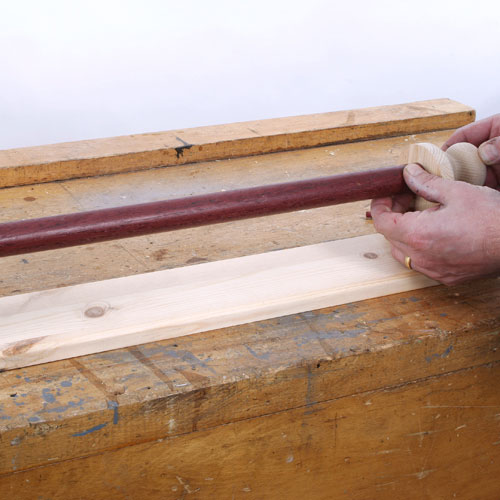
The dowel support bar for the paper roll as to be removable so it is held in place with two screwed knobs. For these I used a couple of lengths of studding, counter boring the nuts into the end of the dowel.
Step 4 - Assemby of the Easel
The Easel now has to be built.
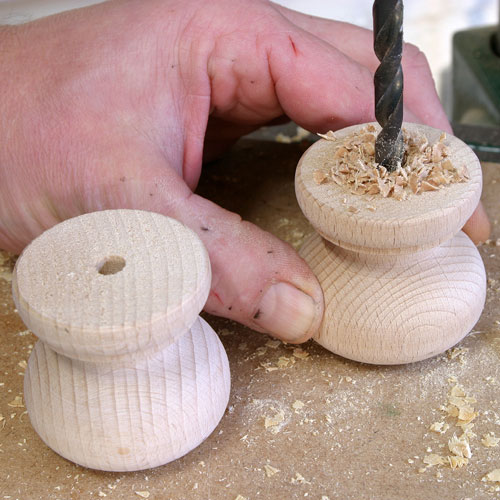
The fixing knobs are standard drawer knobs, drilled to take the studding, which is then secured in place with a smear of epoxy glue.
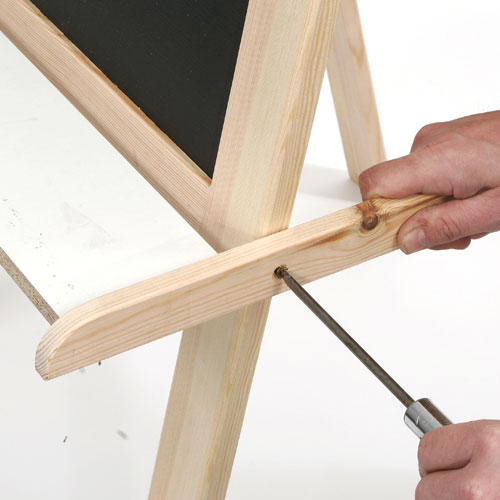
Assemble the roll holder components together to get the required spacing and then fix the upright supports by screwing through from the underside of the top board.
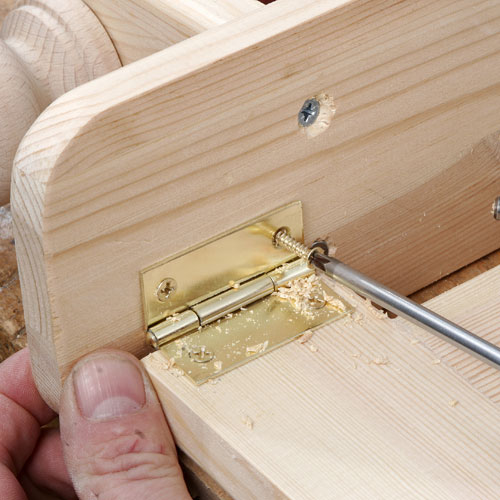
The two frames are attached to the top boards with the hinges, but allow plenty of clearance so that they can open out beyond the vertical position without pulling on the screws. In retrospect it would probably have been better to fit a short length of chain or string to limit the amount of opening.
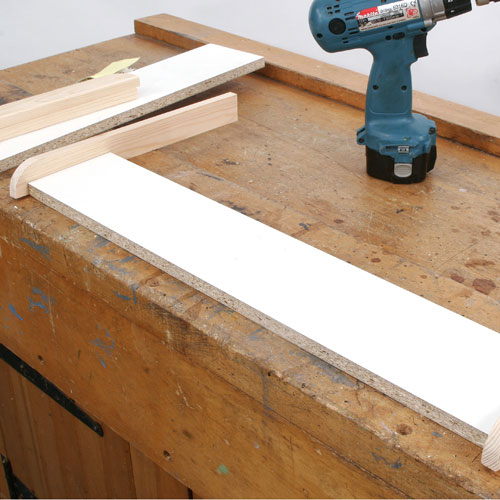
The folding shelves are narrow pieces of melamine faced board attached to support arms.
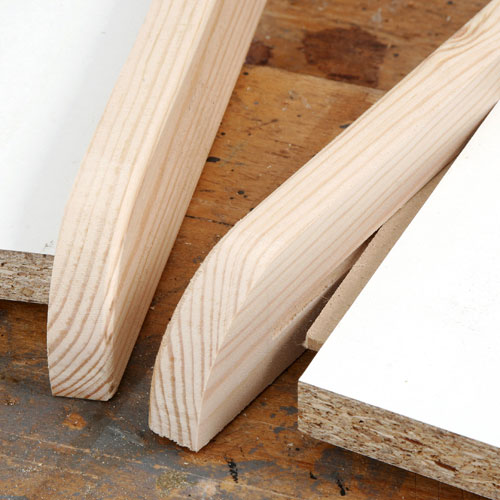
These are assembled using a loose tenon consisting of an offcut of the thin MDF panel material, The grooves for this can then be cut with the same bearing guided cutter that was used for the frames.
Cut a large diameter hole in one of the shelves to take the water reservoir for the painting side of the easel and then glue and clamp the shelves and arms together.
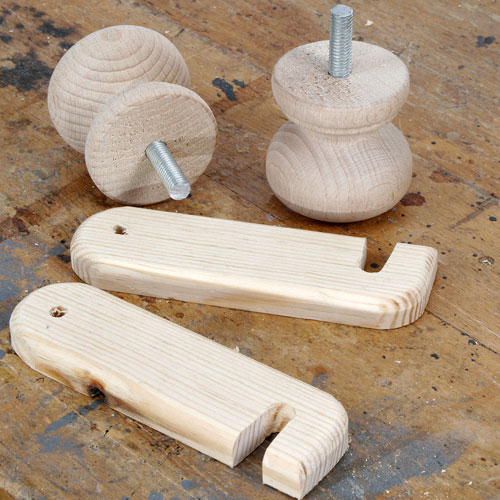
The locking assembly is made up from two more knobs fitted with studding and a couple of shaped latches.
When you come to assemble the shelves on the frames, make sure there is sufficient gap between the back of the shelf and the frame to allow it to fold down and then screw it in place, but don´t over tighten so that the shelf can pivot about the screw, I used mirror screws for all the exposed screws so that they could then be covered with a decorative head, but secure these heads in place with a dab of superglue to prevent them being a choking hazard.
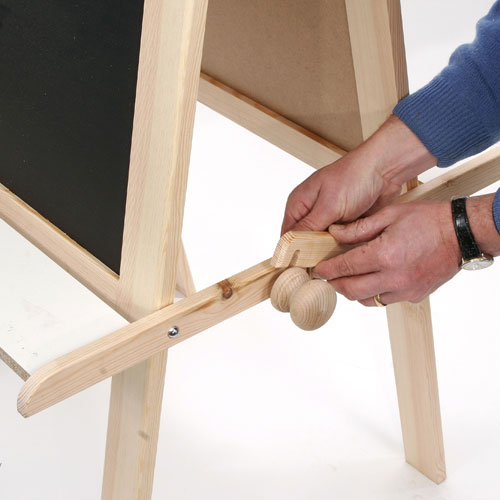
The latch is positioned carefully so that the ends of the two support arms meet in the middle and a captive nut is recessed into the back of one to receive the locking knob.
As the finished easel is inevitably going to be subjected to a certain amount of hard work and moisture, it is essential that all the timber surfaces are protected thoroughly. After a good sanding, I used four coats of cellulose based brushing lacquer, flatting down between to get a really smooth finish.
Step 5 - Additional Decoration
Although the easel is now finished, I decided to add a little colour in the form of some decorative pencils and paint brushes.
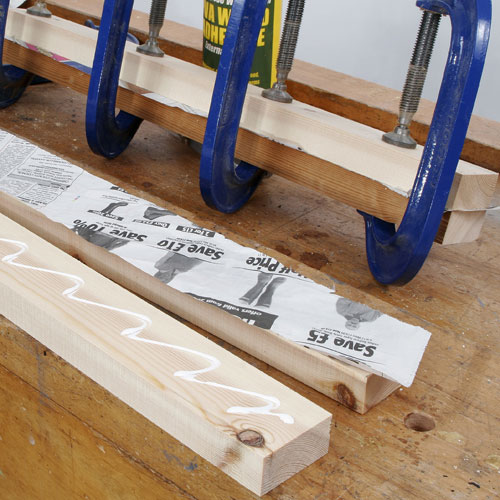
These are made using the split turning technique where two pieces of wood are sandwiched together to form a blank using a strip of newspaper in the glue line.
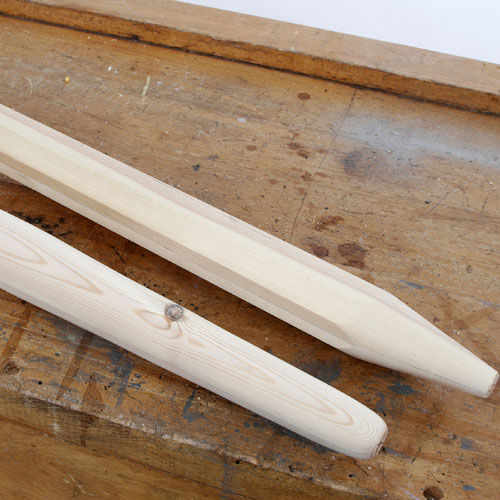
Once the glue is thoroughly dry the blanks can be mounted on the lathe and turned to the required shape. For the paint brushes all that is needed is some shaping for the handle and a little detail to represent the metal bit the holds the bristles. The pencil is first planed to an octagonal section and then turned, one end being profiled to represent the lead and the other shaped to form the eraser.
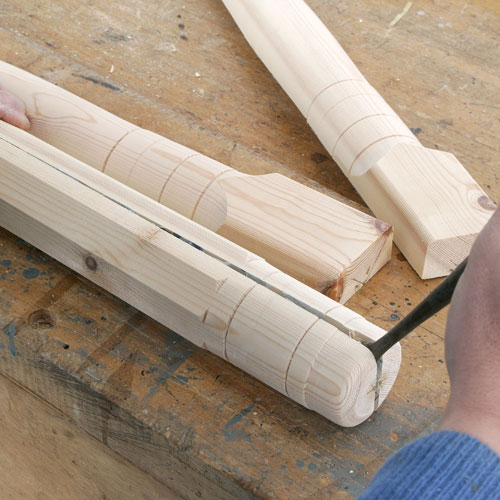
Then simply prise the joints apart using a thin screwdriver to produce two perfectly matched half sections.
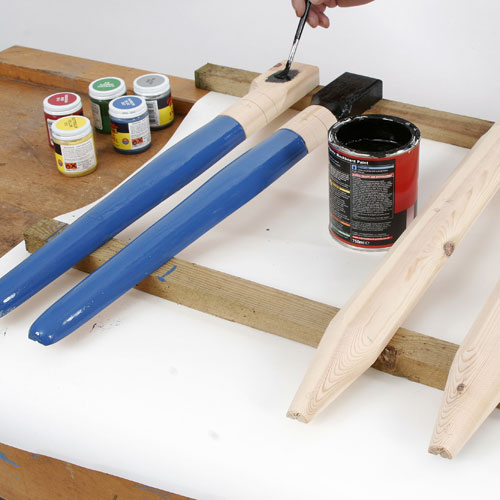
These are coloured using proper childproof paints.
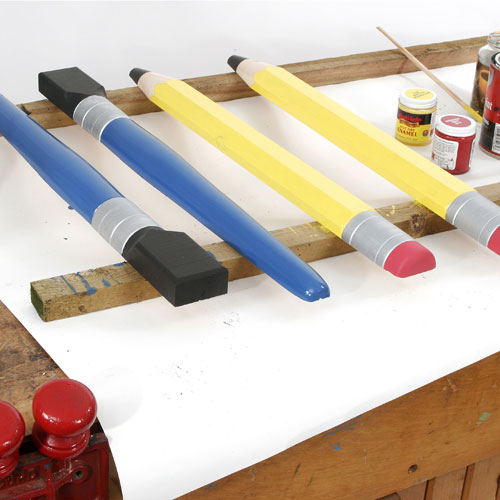
This is quite a long job as each component requires multiple coats in several colours and you have to wait for adjoining areas to dry before you can do the next one. Fortunately the enamels I used were relatively quick drying and the end result justified the labour involved.
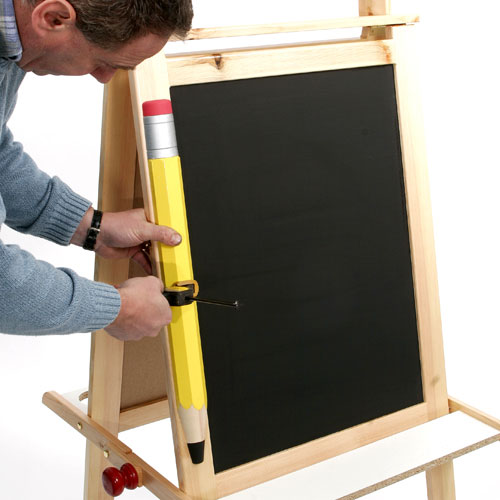
The finished split turnings are then simply glued to the frames, holding them in place with soft face cramps until the glue has set.

Then it is just a master of some serious road testing!
The completed Easel Routing Project.