Turned Table Routing Project
This study table has a heavily moulded base, made by making multiple passes with a variety of router cutter profiles.


This simple looking project is actually a little more involved than you would think, but it is still not that difficult to make. The complication comes from the heavy moulding of the feet, which needs to be made up by making multiple passes with a variety of different router cutter profiles.
However, this is a very straightforward procedure provided you plan it all out thoroughly beforehand and remember to take the various cuts in the right sequence, such that you leave enough support to guide each subsequent one.
Step1 - Preparing Timber
Start by drawing out a full-size pattern of the moulding based around the cutters you have available. It is far easier to do it this way round, rather than drawing a profile first and then trying to match up to it. You actually don´t need that many cutters to produce a really ornate moulding this way, as some of them can be used in several different ways, or by just using a small section of each.


For stability, the top is made up from two pieces, so true the edges carefully with a jointer plane to get them really square and minimize the glue line.


Provided the joint is good enough, I rarely bother with adding biscuits on a small piece like this, but do clamp it carefully to keep the pieces level and reduce the amount of cleaning up needed later.


The stem section is also laminated up from two pieces; ideally cut them out of the same plank to maintain the colour continuity and again apply plenty of pressure during gluing up to minimize the joint line.
You will need to prepare some spare material for the feet, as any operation involving multiple cuts will always require a little trial and error to get the settings perfect. So machine an extra piece or two with exactly the same dimensions, the extra cost involved is minimal, compared with the hassle of preparing another piece to be an exact match later on when you are half way through the project.


The board I had selected for the base components was actually virtually perfect for size as I needed to produce two pieces 3 1/2 inches wide and this was a fraction over 7 inches. However, remember that there is always a certain amount of break out with a router cutter and I was worried that cleaning this off would reduce the finished widths too much.
Also, there is often a little wander at the ends of the cut, particularly when you are working with relatively narrow pieces. For this reason I decided not to try and squeeze the two pieces from a single board, but go for the more wasteful but safer option and use two of these full width boards and then cut a single clean narrower section from each.
Step 2 - Moulding the Foot Boards
Now the foot boards of the stand need to be formed.


Cut out your drawing of the moulding and use this as a template to mark the profile on the end of one of the foot boards.


To minimize the amount of dusty router work you can now clearly cut away a large amount of the waste on the bandsaw. This makes a tremendous difference to the speed at which you can work with the router and also to the quality of finish of the cut.


Plan out the sequence of routing operations to give you maximum support and guidance until the last minute. It is usually better to start with the innermost cut, adjusting the depth of cut of the router and the position of the fences on the table to position it correctly.


It is rarely possible to judge this exactly, so err on the cautious side and make a trial cut to see how it matches up to the marked profile and make any necessary changes. Once you are happy with the setting, run the mold across both ends of each workpiece feeding the work fluidly to avoid any burn marks.


Repeat the procedure with the next cutter, taking several light passes if necessary and reducing the router rotational speed if the cutters are very large.


Keep reassessing the profile to see if you can remove any more of the waste by sawing.


In this case I was able to remove another quite large chunk on the bandsaw, so that there was only the bare minimum to remove with the very big ball end cutter.


You may find that there is not enough lateral adjustment on the router table fences to allow you to position the work exactly where you want it, but you can easily overcome this by using shims of MDF, but remember to clamp them firmly to the fence.


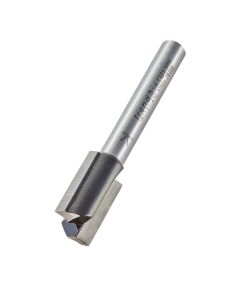
The flat in the moulding is machined using a two flute cutter with bottom cut, but you´ll need a fairly long one to be able to reach sufficiently high on deep mouldings.


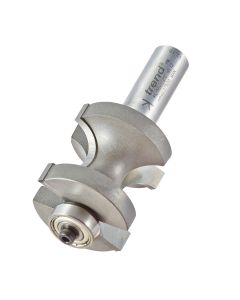
The final cut is made with a very large staff bead cutter, but this has to be used within the opening of the fences, which reduces the amount of support available. Overcome this by clamping the work firmly to the mitre guide on the table before pushing through.


This is important because this last cut also removes the support from the outfeed fence, as it leaves a gap between the two. If this fence is not independently adjustable, as in my case, the work must be held securely in some other way or it will tip into the cutter at the end of the pass. I find that simply holding it on the mitre guide is not good enough either and a clamp is essential to prevent it 'creeping'.


You should now have your finished profile, albeit with a few wobbly bits and a some break-out on one edge.


Clean up one face and cut out the required finished width from each piece.


Ideally then running them through the thicknesser to produce two perfectly matched halves.
Step 3 - Assembling the Base


They are joined together at right angles to form the base with a simple half lap joint, so use one piece as a guide to scribe the joint on the other.


The joint can be cut in various ways, but I used the trenching stop on my sliding head mitre saw, removing the waste with a series of closely spaced cuts and then cleaning up with a sharp chisel.


A little fine-tuning may be necessary to get the joint perfect, a common mistake being not to cut it deep enough so that the two halves cannot then finish flush.


Once they are assembled, mark the centre of the base by drawing in the diagonals of the central square and then drill a 1 1/2 inch diameter hole to take the pin on the end of the stem. This hole must be both vertical and dead centre so drill it with care, preferably using a drill press for absolute precision.


This will produce a really strong joint when it is all assembled later and you can see that it must be dead central, or the square of the stem will not line up the edges of the feet.
Step 4 - Shaping the Stem Section
To achieve this, the stem itself must obviously be dead square and exactly the right dimension


This is not a problem with a thicknesser, but make sure to take stock evenly off adjacent faces to keep the joint in the centre.


Mount the blank carefully on the lathe making sure it is centred accurately and that the tool rest is well clear of the spinning corners.


Use a skew chisel on its edge to mark in where the shoulders need to be, initially starting in the waste area well clear of the line and then gradually moving back until you hit the line.


Once the shoulders are established at both ends of the blank you can safely remove the waste in between and start forming the profile.


Turn a pin on either end that is a tight fit in both the foot and the top sizing this carefully with a pair of callipers, as the strength of the finished table relies on this joint being tight.


The finished design of the stem is a matter of personal taste but with this style of table it needs to be left fairly chunky, so don´t overdo the detail.
Step 5 - Edge Moulding the Top
When the glue has cured thoroughly the top can be removed from the clamps and squared up to the finished size.


The central joint should require only minimal cleaning up provided you were careful with the alignment at the clamping stage.


The edge moulding is routed using the same large staff bead cutter that was used for the base and again the work has to be clamped securely to the mitre guide to maintain the necessary constant support.


This is perhaps even more important on the top as you cannot clean up any deviations later, the cut must be perfect all the way through.


However, to minimize breakout make the two end grain cuts first, followed by the long grain ones, to leave a perfectly clean and square corner. If you do not have a staff bead cutter big enough you can achieve the same effect using a rounding over cutter, but making separate cuts from the top and the bottom.


That is all there is to the making the top, but take a close look at it and decide which is to be the top face. Mark out the centre of the underside and drill another hole to match the pin on the spindle, which must again be a tight fit to maintain the strength.


A trial 'dry' fit is always a good idea whatever the scale of the project you are working on, and in this case I could see that the shoulders on the top of the spindle were very slightly radiused, leaving a gap between it and the top. A few minutes back on the lathe soon sorted this out and the glue line was then much reduced.
Step 6 - Sanding and Lacquering
It is far easier to clean everything up before assembly, so do any sanding that is necessary at this stage.


I slightly radiused the edges of the feet mouldings using some 180 grit abrasive paper, not enough to spoil the detail, but just enough to take off the very sharp edge.


The top was smoothed with a standard orbital sander which is usually plenty good enough provided you do not use very coarse abrasives. If you do, they tend to leave a series of tiny circular scratches that are difficult to remove later. A better option for final finishing on finer quality work is a random orbit sander, which normally leaves a perfectly scratch free finish.


After assembly the whole job was finished using several coats are brushing lacquer, flatting down in between with 400 grit silicon carbide paper.


This is the completed Turned Table Routing Project.
Written by Alan Holtham - Established woodworking author and video producer.


