HOW TO USE A HINGE JIG
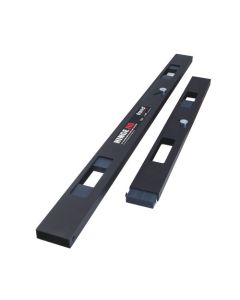
The two-part jig is assembled by engaging the locating tabs into the T slot profile and sliding together. The large central knurled locking knob is used to secure tighten against the tabs once they are in position.

Door hanging can be a time consuming task and fitting the hinges accurately is important to ensure the door fits well into the opening and swings correctly to prevent it binding and to also give a neat appearance when it is hung.
The Trend Skeleton Hinge Jig ref. H/JIG/C is designed to make the hinge mortices in both the door and frame or lining and it can also be used to hang new doors to existing frames and linings.
The two-part jig is assembled by engaging the locating tabs into the T slot profile and sliding together. The large central knurled locking knob is used to secure tighten against the tabs once they are in position.

The smaller secondary locking knob is used to join the two jig components together.

The top section of the jig has an etched line to indicate a traditional 6in/150mm setting position for the top hinge.

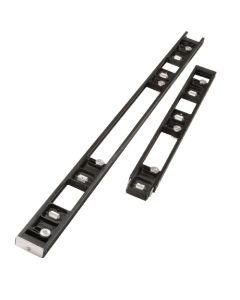
A series of six sliding blocks, secured with central locking knobs set the hinge positions in the jig.

The blocks slide up to the hinge leaf to set the correct width before locking them off.

A small offset horn on each block sits to the hinge leaf edge. The offset automatically sets the ratio between the cutter and guide bush to eliminate any need to measure anything.

A series of edge setting discs slide across to set the hinge leaf backset. There are preset indents for common hinge leaf backsets of 20, 25 and 30mm.

Secure the hinge backset position on each block with a screwdriver.

This end plate hooks over the top of the door to set the top gap when the door is hung. It rotates for left or right hung doors.

Before securing the jig, check the end plate is tight to the top of the door.

Also ensure the setting discs are all be tight to the edge of the door.

With the jig correctly positioned, it is secured to the door using the supplied bradawls.

The router is set up with a suitable 12mm cutter such as Refs. 3/8LX1/4TC, TR12X1/4TC or C019AX1/4TC.

Fit the supplied 16mm guide bush to your router. You may need to use a Trend Unibase Ref. UNIBASE if the guide bush doesn't fit directly to your router.

Position the router onto the jig and plunge the cutter until it touches the surface of the door edge and lock the setting.

Use the hinge leaf as a gauge to set the routing depth using the turret and depth post.

Each hinge position is routed to remove all of the waste.

The routed hinge recesses have rounded corners that will need to be squared up.

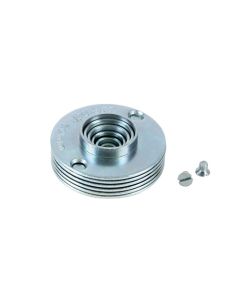
The Trend Corner Chisel Ref. C/CHISEL makes short work of cleaning out the corners.

A sharp blow with a hammer squares up and removes the corner waste.

Once the recess is cleaned out the hinge will sit cleanly and perfectly flush to the door edge.

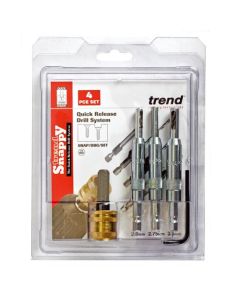
A Trend Hinge Drill such as Ref. SNAP/DBG/SET ensures the screw holes are perfectly central before screwing the hinges in place.
With the door prepared with the hinges fitted, the frame is routed in the same way. There's no need to reset the blocks or discs on the jig as it is a template to replicate the door hinge positions to the frame.

When positioning the jig to the frame or lining the setting discs must address the frame edge and the rotating end plate pushed tight to the underside of the frame.

Rout each hinge recess in the same way and clean out with the Corner Chisel and drilling the screw holes with the Hinge Drill.

Secure the hinges to the door, running all the screws into place.

Secure the door into the frame on a single screw per hinge to check the fit of the door into the opening and it is good, run in all of the screws to complete the job.